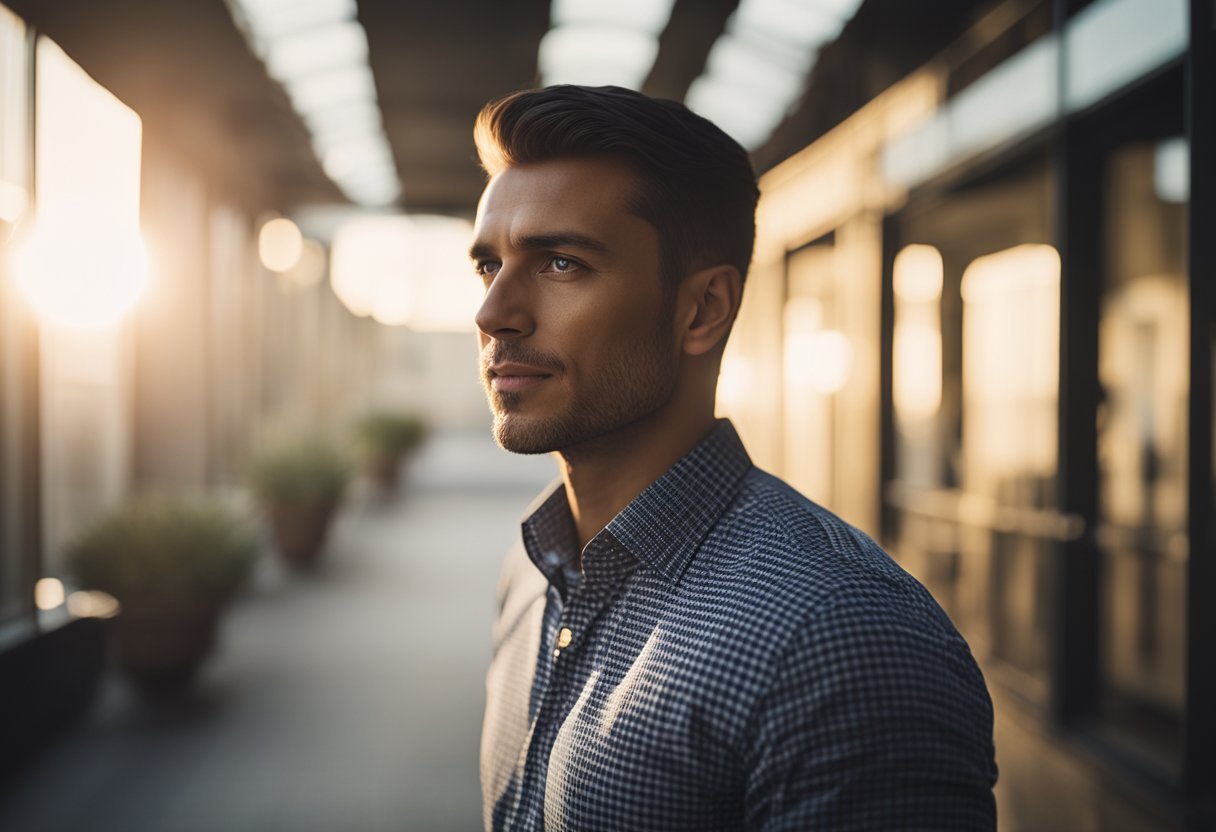
Capturing stunning male portraits is both an art and a science. It’s not just about snapping a photo; it’s about telling a story through the lens. To create compelling male portraits, we need to master the right poses, lighting, and composition techniques. This sets the foundation for producing images that are not only striking but also full of character.
We’ve got some exciting tips to share, starting with how to make our subjects feel comfortable in front of the camera. Engaging with them and encouraging natural movements will make our photos look authentic and lively. Techniques like the classic “leaning sideways against the wall” or the strong “crossed arms” stance can add an edge to our portraits.
Let’s dive into these methods and learn how to bring out the best in male portrait photography. From highlighting unique personality traits to using lighting to our advantage, we can elevate our skills and create photos that stand out. For a deeper dive, check out this comprehensive guide to portrait photography.
Posing Techniques for Dynamic Portraits

To capture striking male portraits, we need to focus on body language and facial expressions that convey strong emotions and natural poses. Let’s dive into how to make these elements work harmoniously.
Guide to Body Language
Mastering male portraiture starts with understanding how body language can communicate confidence and dynamism. Posture is key. Encourage subjects to stand tall but relaxed. Slight tilts of the shoulders can add a touch of casualness while maintaining poise.
Hand placement is equally crucial. Hands in pockets, one hand on the hip, or the classic arms crossed position can drastically change the tone of the photo. Experiment with angles; having the subject lean against a wall or sit can create a sense of ease and authenticity.
Using props can also enhance poses. A chair, for instance, can be used in versatile ways—leaning on it, sitting casually, or draping an arm over the back. This not only adds depth but also aids in making the subject appear more approachable and dynamic.
Facial Expressions for Emotional Impact
Facial expressions are the soul of a portrait. To capture genuine emotion, we need to interact with our subjects, making them feel at ease. Start with a natural smile. It’s the easiest way to break the ice and can evolve into more nuanced expressions as the session progresses.
Eliciting different emotions can be as simple as asking subjects to think of certain memories or scenarios. Encourage them to reflect on funny or heartfelt moments to capture a range of emotions from joy to contemplation. This variety adds depth to our portraits.
Eye contact with the camera can be intense and captivating, but having the subject look away or focus on an off-camera point can add mystery and intrigue. Understanding these subtleties will help us craft portraits that resonate on a deeper emotional level.
For detailed techniques, check out this guide to posing men and this full body portrait posing guide.
Mastering the Art of Lighting
In male portrait photography, the secret to striking images lies in mastering lighting. This section covers crucial aspects like the use of natural versus studio lighting and key lighting techniques.
Natural Light vs. Studio Light
Natural light offers a softer, more organic look, ideal for creating genuine portraits. It’s abundant, easy to work with, and doesn’t require expensive equipment. We can use windows, doors, or open spaces to harness it effectively. Timing is crucial; the golden hour provides the best natural light for portraits.
Studio light gives us control over every element. Whether using key lights, fill lights, or backlights, we can manipulate shadows, highlights, and textures precisely. It also enables us to work consistently regardless of the time of day or weather conditions. For consistent, professional results, studio lighting is indispensable.
By understanding the strengths and limitations of both natural and studio lighting, we can choose the best approach or even combine both to achieve our photographic goals.
Key Lighting Techniques for Portraits
The three-point lighting setup is fundamental for portrait photography. It includes a key light, fill light, and backlight. The key light is the main light source, placed at a 45-degree angle to add depth and dimension. The fill light, positioned on the opposite side, reduces harsh shadows.
Rembrandt lighting is another powerful technique. It uses one light source to create a small triangle of light on the subject’s cheek, adding drama and depth. For a softer look, loop lighting positions the light slightly above eye level, casting small shadows below the nose.
By mastering these techniques, we can enhance male portraits, making them visually compelling and emotionally engaging.
Creative Composition in Portrait Photography

Let’s explore two essential techniques that will elevate our male portrait photography. By mastering the Rule of Thirds and Leading Lines, and creatively integrating backgrounds, we can craft visually stunning and narratively rich portraits.
Rule of Thirds and Leading Lines
- Rule of Thirds: Divide the frame into nine parts with two horizontal and two vertical lines; place subjects along these lines or intersections for balanced portraits.
- Engaging Composition: Using the Rule of Thirds draws attention to key elements and creates a naturally appealing image.
- Leading Lines: Guide the viewer’s eyes to the subject using elements like roads, buildings, or natural features.
- Depth and Interest: Leading lines add dynamism and intentionality to your portraits.
Combining the Rule of Thirds with Leading Lines makes our compositions both balanced and compelling. These strategies can transform a simple portrait into a piece of art, making the subject stand out while maintaining harmony within the frame.
For more of Rule of Third and Leading Lines read here!
Integrating Backgrounds for Compelling Narratives
A well-chosen background adds context and tells a story. Whether we’re shooting outdoors or in a studio, the background should complement the subject rather than distract from them. Urban scenes might emphasize a modern and edgy look, while natural landscapes could convey a sense of calm and introspection.
Matching the background with the subject’s personality or attire can enhance the portrait’s narrative. For instance, rugged outdoor settings can highlight masculine qualities, whereas a minimalist background might draw attention to the subject’s expressions and features.
We should experiment with different backgrounds to see which ones create the most compelling narratives. Sometimes, even the simplest adjustments can make a significant difference, transforming our portraits from ordinary snapshots to captivating stories.
By thoughtfully integrating backgrounds, we not only add depth but also infuse our portraits with meaning and context, making each image uniquely memorable.
Post-Processing Techniques for Impactful Portraits

To create impactful portraits, we need to focus on both basic editing workflows and advanced color grading. These techniques help in refining our images and giving them an expressive, polished look.
Basic Editing Workflow for Portraits
- Basic Edits: Start with exposure, contrast, and white balance adjustments for a well-lit subject and accurate colors.
- Sharpening: Enhance details like eyes and hair using tools like Lightroom’s Detail panel.
- Noise Reduction: Essential for high ISO images, maintaining a clean and professional look.
- Spot Removal: Fix blemishes while keeping the skin’s natural appearance.
Advanced Color Grading for Expressive Tones
Color grading takes our portraits to the next level, adding emotional depth. We start with hue, saturation, and luminance (HSL) adjustments to individually tweak colors.
For instance, enhancing the reds and oranges can make skin tones appear warmer.
- Split Toning: Apply different colors to shadows and highlights to create mood and add depth to portraits.
- Color Mood: Subtle coloring enhances the theme and visual interest of the image.
- Presets and LUTs: Use presets or custom Look-Up Tables for consistent color grading across multiple images.
- Professional Consistency: Ensures uniformity and quality in professional projects.
Finally, we leverage tools like Lightroom’s radial and graduated filters to draw attention to the subject, adding a vignette or selectively highlighting parts of the portrait.
By marrying basic edits with advanced color grading, our portraits become visually compelling, fully capturing the essence of the subject.
Camera Settings and Lens Choices

Let’s dive into some fundamental camera settings and lens options to enhance our male portrait photography. Understanding the right combination of aperture, shutter speed, ISO, and lens selection will enable us to create striking portraits with the perfect depth and clarity.
Aperture, Shutter Speed, and ISO Basics
When shooting male portraits, the aperture is crucial. Using a wide aperture (e.g., f/1.8 to f/4) allows us to achieve a beautifully blurred background, making our subject stand out. This technique, known as shallow depth of field, is often preferred for portrait photography to add a professional touch to our images.
- Shutter Speed: Start with 1/100 to 1/125 to avoid motion blur, especially for slight subject movement.
- Longer Lens: Increase shutter speed to 1/250 when using a 200mm lens to prevent camera shake.
- ISO Setting: Keep ISO low, around 100, for minimal noise and high image quality.
- Low Light: Increase ISO cautiously; prefer adding external light rather than heavily relying on ISO adjustments.
Selecting the Right Lens for the Shot
Choosing the right lens significantly impacts our portraits. A classic choice is an 85mm lens, renowned for its flattering perspective and ability to create sharp, vivid images. It provides just the right amount of compression to make facial features look natural and well-proportioned.
For headshots and close-up portraits, using lenses with longer focal lengths, such as 135mm or 200mm, can avoid perspective distortion. This helps in emphasizing our subject’s features without exaggerating any particular part of the face, like the nose.
If we are aiming for full-body shots or groups, switching to a 50mm lens is beneficial. It allows us to include more context within the frame without forcing us to move too far back, making it easier to manage within different shooting environments.
By carefully selecting and adjusting these settings and choosing the right lens, we can elevate the quality of our male portrait photography effortlessly.
Our experiences with Male Portrait Photography
Our journey with male portrait photography has been an incredibly rewarding experience. What began as a casual interest has evolved into a deep appreciation for capturing the unique strength and character of men through the lens.
Each session is an opportunity to explore different facets of masculinity—whether it’s the quiet confidence in a relaxed pose, the intensity in a gaze, or the subtle nuances of a natural smile.
We’ve learned that the key to a successful male portrait lies in creating an environment where the subject feels comfortable and authentic. This allows us to capture not just a face, but a personality, a story. Working with natural light has been a game changer, as it adds depth and dimension to the images, highlighting strong features like the jawline or the texture of facial hair. Experimenting with angles and compositions, such as using the Rule of Thirds or incorporating leading lines, has taught us how to craft visually engaging portraits that draw viewers in.
Overall, our experiences with male portrait photography have been a continuous learning process, filled with creativity, challenges, and the satisfaction of capturing moments that resonate with emotion and strength.
FAQ – Male Portrait Photography
What is the best pose for a photo male?
The best pose for a male photo often emphasizes confidence and natural posture. A strong, relaxed stance with one hand in the pocket and shoulders slightly turned can highlight masculinity and create a flattering angle. Additionally, ensuring good posture and a subtle expression adds to the overall impact.
How to be photogenic as a guy?
To be photogenic as a guy, focus on relaxing and maintaining good posture, as confidence shows in photos. Find your best angles by experimenting with different head tilts and expressions, and ensure natural lighting enhances your features. A genuine smile or a subtle, relaxed expression can make a big difference.
How to look masculine in a picture?
To look masculine in a picture, adopt a strong, confident posture with squared shoulders and a relaxed stance. Emphasize your jawline by slightly tilting your head and keeping your chin up. A serious or subtle expression can also enhance a masculine vibe.
How do I take good pictures of my man?
To take good pictures of your man, focus on capturing his natural expressions and relaxed posture. Use natural light to highlight his best features and experiment with angles that emphasize his masculinity. Encourage him to feel comfortable and confident, which will reflect in the photos.
Are you interested in Male Portrait Photography? Then you might be interested in our article on the Night Portrait Photography or the Urban Portrait Photos.